Spring Whispers: A Soft and Layered Card for the Altenew April Challenge
- carogeo2
- Apr 30
- 2 min read
Hello Crafty Friends!
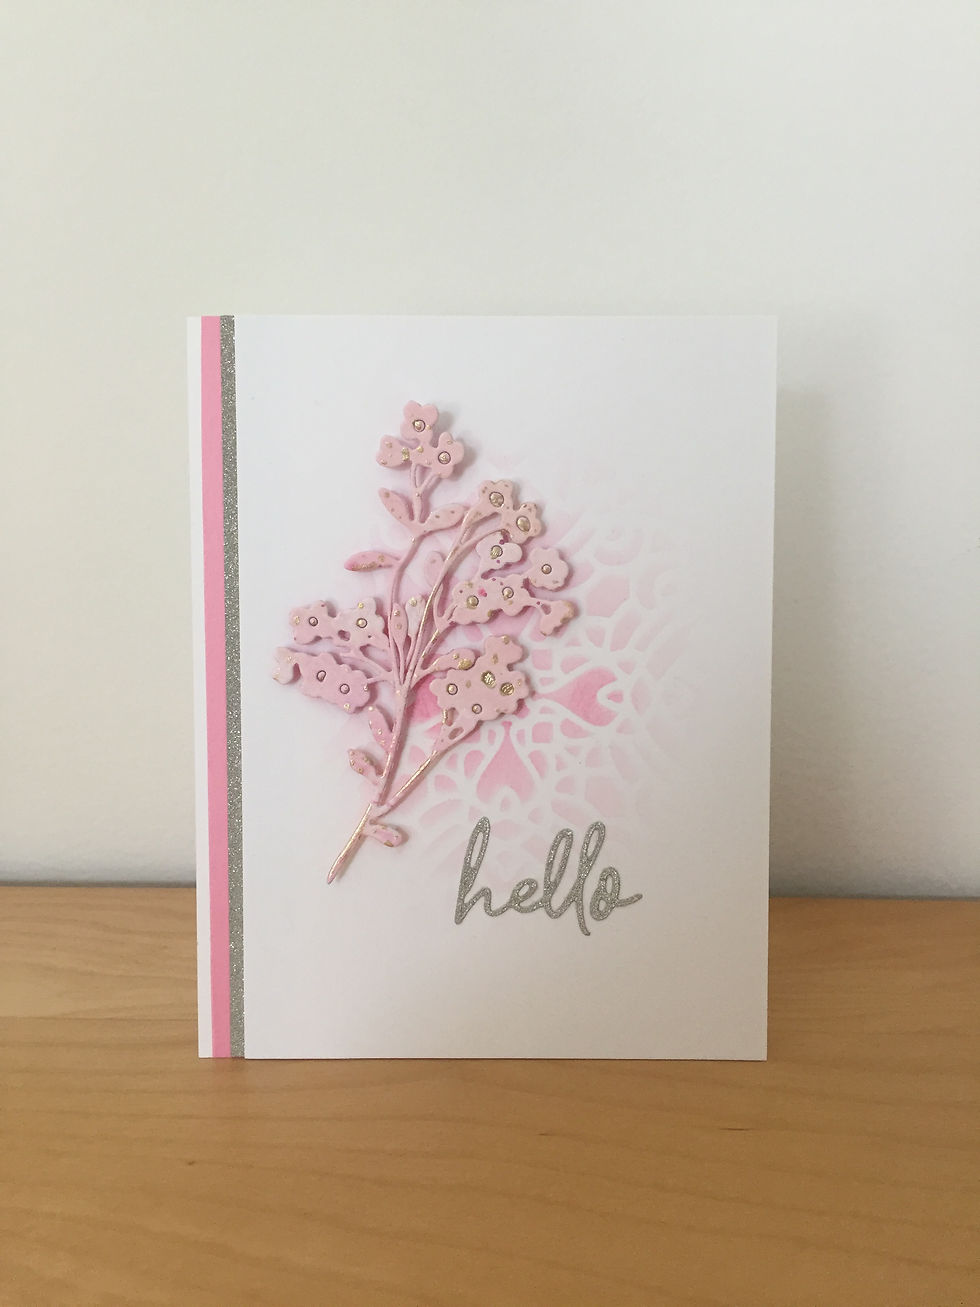
🌿💖 Spring is in full swing, and what better way to celebrate than with some fresh colors and a touch of crafty magic? Today I'm sharing a soft, layered card — it’s all about pink petals, shimmering leaves, and a heartfelt "hello." Let’s jump in! 🌸✨

Today's card is inspired by the Altenew April 2025 Inspiration Challenge — you can check it out here: https://blog.altenew.com/april-2025-inspiration-challenge-pretty-in-pink-handmade-cards/ I’d love for you to join in — it's such a fun way to spark ideas (plus, there are gift cards to be won!).

For this card, I wanted something soft, fresh, and a little bit playful. I started with the classic flower from Altenew’s Beautiful Day Layering Stamp Set — it’s one of those sets I keep coming back to. I stamped the layers in Pink Diamond and Pinkalicious Fresh Dye Inks. To get a really soft base, I used Pink Diamond as a second-generation stamp — just stamped it off once to lighten it up before putting it on my paper. For the flower center, I went with Jazzberry for a little extra pop.
But I wasn’t quite done with the flower yet! I decided to stamp it twice: first, I fussy-cut the whole bloom, and then I fussy-cut just the middle from the second image. After curling the petals a little, I layered both pieces with foam tape. It really brings the flower to life!
To add a bit of greenery, I painted a loose green circle onto a white watercolor panel, let it dry, and then flicked on a few golden watercolor specks for some sparkle. While that dried, I die-cut some delicate leaves from two different types of vellum, using Altenew’s Gardenia and Berries and Branches die sets.
For the sentiment, I kept it sweet and simple — just a small "Hello," die-cut from white cardstock with the add-on dies from the Watercolor Roses Layering Stencil Set.
Once all the pieces were ready, I played around with the arrangement, tucking the vellum leaves here and there around the flower. I added a few touches of Enchanted Gold Shimmer Relief Paste — little leftover bits from a previous project — onto the bigger leaves, just to pick up the sparkle from the background splatters. If you’re curious how I made those shimmer bits, you can peek at the second card of my previous post.
Finally, I glued the whole 4" x 5¼" panel onto an off-white A2 card base, and voilà — my project was finished.

I’d absolutely love to know what you think! Feel free to leave a comment — it always makes my day to hear from you. And if you’re feeling inspired, why not join the Challenge too? It’s a great excuse to create something pretty and connect with other crafters.
Thanks so much for spending a little crafty time with me today. I hope you leave with a little sparkle of inspiration. Happy crafting! 🌸

Comments