From Everyday Use to Pretty Storage: Upcycled Tissue Box
- carogeo2
- Jul 25, 2025
- 4 min read
Updated: Jul 27, 2025
Part 2 of the AECP Level 2 Final Challenge
Hello Crafty Friends!
In Part 2 of my AECP Level 2 Final Challenge, I share how I transformed an empty tissue box into a beautiful and practical storage solution for Altenew Mini Delight stamp and die sets. This eco-friendly project includes step-by-step instructions for decorating the box, creating custom paper sleeves (no plastic!), and organizing your collection in style. Let’s dive right in!

🧺 Upcycled Tissue Box
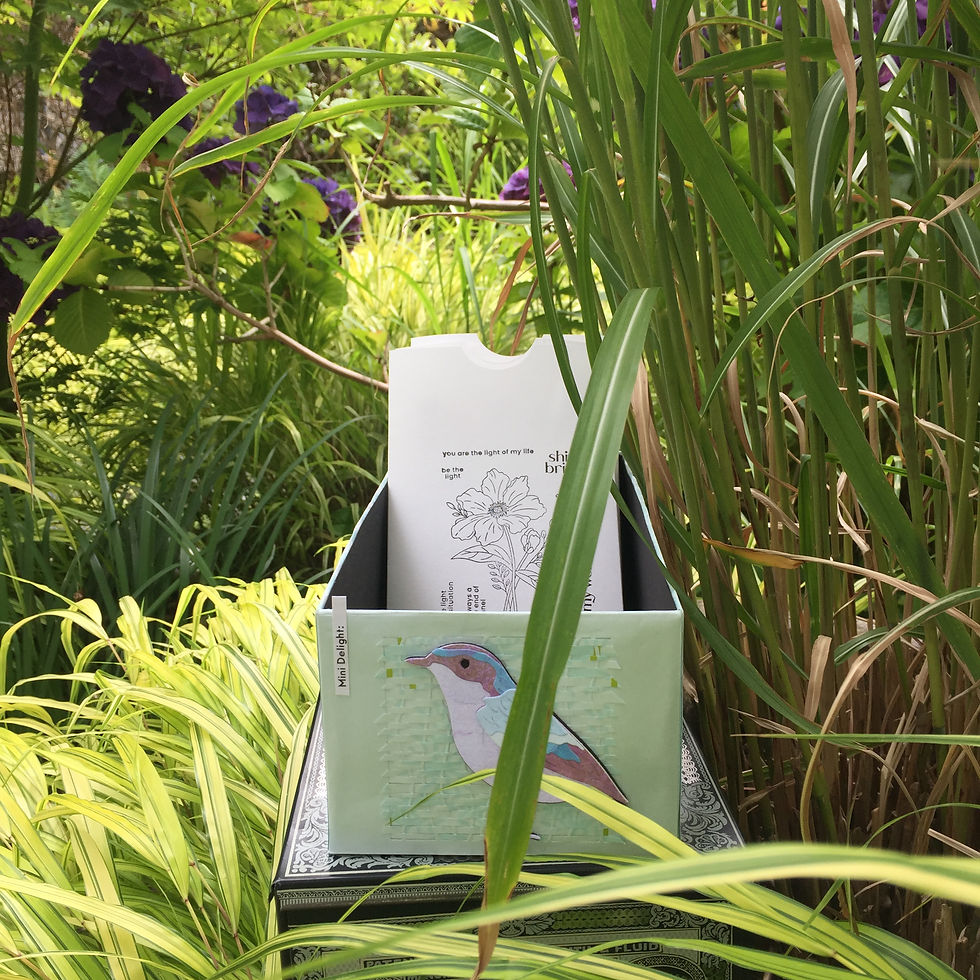
Because I needed storage for my Altenew Mini Delights, I decided to upcycle an empty tissue box as part of my AECP Level 2 Final Challenge. My goal was to turn it into a pretty and functional storage container with custom paper sleeves to house each Mini Delight stamp and die set together. I didn’t want to use plastic sleeves or pouches for environmental reasons — so this solution felt both creative and sustainable.

🎥 Video
By the way, you can also check out the second part of the video I shared in my previous post, Weaving Masculine and Feminine Elements through Cards for Guys.
It features all the fun projects I created for this challenge — cards, envelopes and this upcycled storage box with sleeves for stamps and dies.
📦 The Box
For the inside of the box, I used black cardstock; for the outside bottom (not visible unless turned over), I chose brown cardstock. For the outside sides, I selected a pretty gift-wrapping paper from my stash: light blue with a pearly shine, decorated with bird silhouettes — I love birds! The wrapping paper also has a nice weight to it. Combined with the extra cardstock, this makes the upcycled box sturdy and beautiful.

How to Recreate the Box:
Cut the top: Cut the remains of the box’s top at a diagonal from the center toward the corner. Do this on all four corners.

Fold and glue: Fold the flaps created by these cuts inward and glue them down using a strong adhesive. This cleans up the edge and reinforces the sides. 💡Tip: Use bookbinding clips to hold the flaps in place while they dry.
Measure: Measure all box surfaces so you know how large to cut your paper pieces. 💡Tip: Add about ½ inch to most sides for overlap — this will help create clean edges.
Cover: Begin covering the box with paper, starting with the outside and inside bottoms (using larger pieces for overlap).

Wrap the sides: Glue the outside sides next, allowing for overlap at the top and bottom as well as two of the four sides.
Finish the inside: Glue down the inside sides last to hide all overlaps from earlier steps.
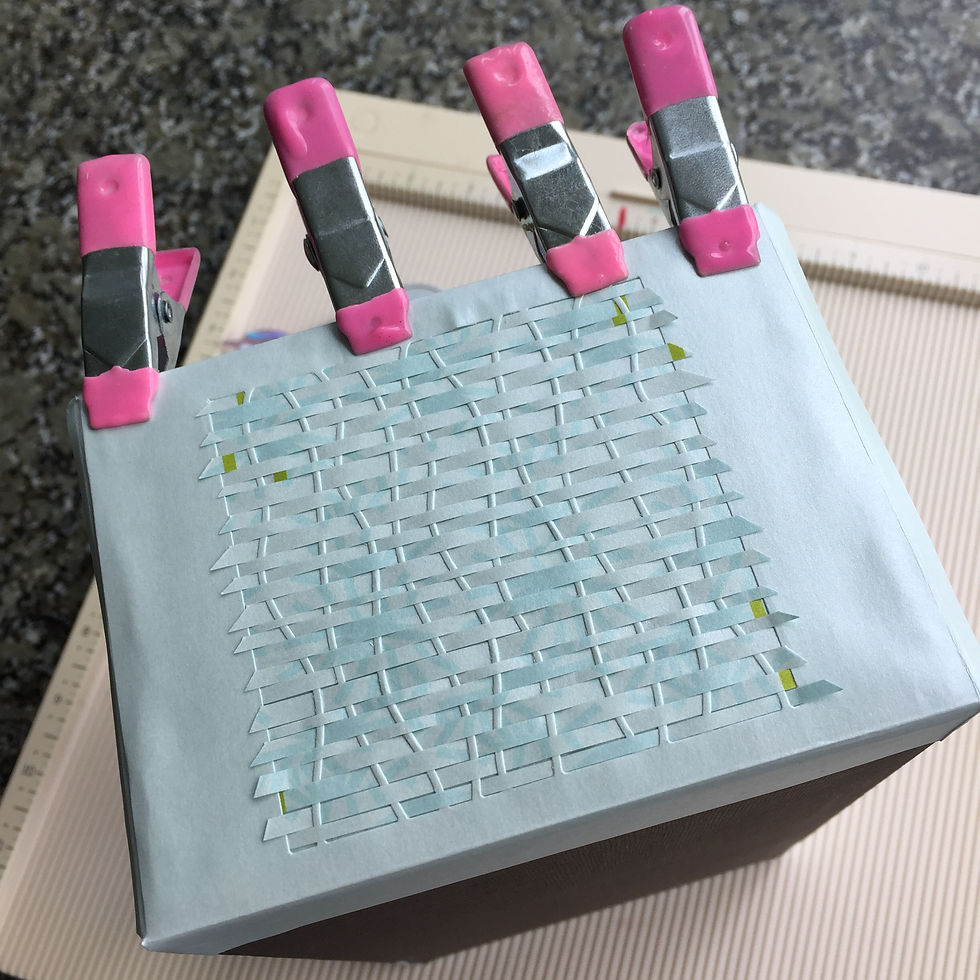
Optional: Decorate the visible front side of the box (facing out on your shelf). I used a subtle, tone-on-tone over-under paper weaving and added a layered bird (cut from gel-printed papers with the Bird of the Mountain Die Set). For dimension, I cut the base from black fun foam. I also added a tiny label — “Mini Delight” — to the left corner of the front.


Check out the video for a look at every side and detail of the upcycled box.
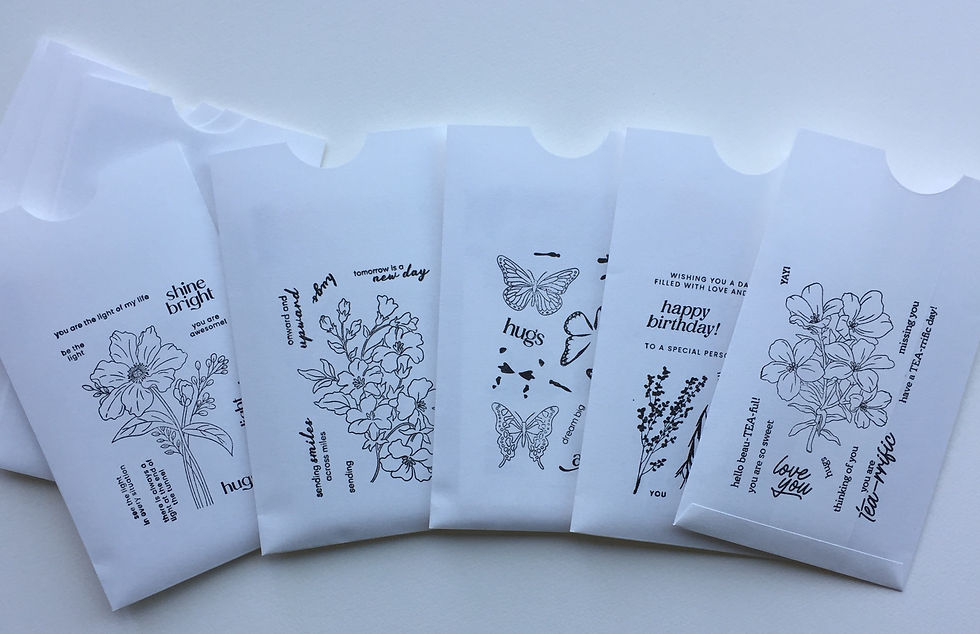
📁 The Sleeves
How to Make the 4.25" x 7" Sleeves:
Start with a 10" x 7.5" piece of medium-weight paper.
Score at 2.5" and 6.75" along the long side (this gives a generous 1.5" overlap).
Score at ½" along the short side.

Fold all score lines and reinforce with a bone folder.
Cut away the small rectangles at each corner, angling your cuts slightly.

Glue the long flap first, then the bottom flap.
For easy access, punch a half-circle at the top using a circle punch.

Decorate both sides:
Stamped side: Tape the full stamp set (with carrier sheet) into your stamping platform and stamp it all at once using Obsidian ink for a crisp, clean look.


Die side: Cut the coordinating dies from patterned paper and glue a simplified (non-layered) version to the back of the sleeve for easy browsing. 💡Tip: A flat version avoids unnecessary bulk while still helping you identify the set at a glance.

Repeat for each of your Mini Delights — I currently have five — and don’t forget to make a few extras for future additions! 💡Tip: Store spare patterned papers in one of the extra sleeves for quick die-cutting later.
BTW: With slight modifications, these sleeves can also be turned into envelopes. Simply score an additional 1" flap on the top of the short side and leave that flap unglued until you’re ready to mail. Measurements depend on the size of your card.
🛠 Altenew Materials Used
Bird of the Mountain Die Set
Mini Delight Stamp & Die Sets:
Afternoon Delights
Plants & Vases
Butterfly Dreams
Breezy Quest
Light My World
Obsidian Ink
💌 Over to You
And that concludes my AECP Level 2 Final Challenge project! I really like how this turned out -- functional and pretty. I hope you like it too and leave inspired. I would love to hear from you in the comments, on YouTube and/or on Instagram @caracaro33. And I'm curious to find out whether you make your own storage as well. Thank you so much for spending this time with me.
🎨 🖋️🌼 Until next time — happy crafting! 🎨 🖋️🌼

Comments