Finishing AECP Level 2 Classes with Masking Magic
- carogeo2
- Jun 25, 2025
- 3 min read
🖌️ Hello Crafty Friends!
I’m so excited to share my cards for the final AECP Level 2 class: Masking Unleashed! This class —like every AECP class— was so enjoyable. It presents different types of masks and different techniques to incorporate them into creative card designs.
I created two cards for this class. Let’s take a closer look!
Card 1: Layered Leaves & Tranquil Hues
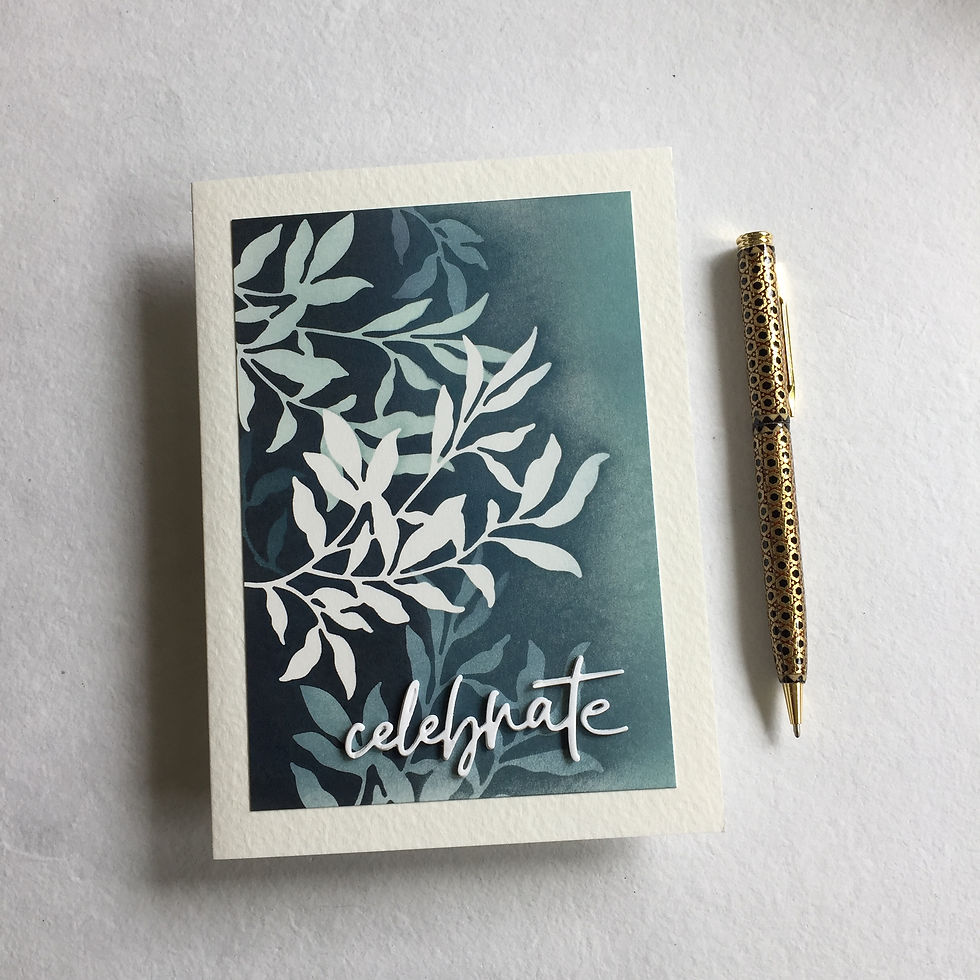
🛠 Materials used:
Just Leaves Die Set
Celebrate Die (from the Sweet Sentiments Die Set)
Masking Paper
Crisp Dye Inks: Misty Morning, Cloudy Sky, Nimbus, Dark Night (from the Tranquility set)
Watercolor paper (200 and 300 gsm)
Large Blending Brushes
🎨 How to:
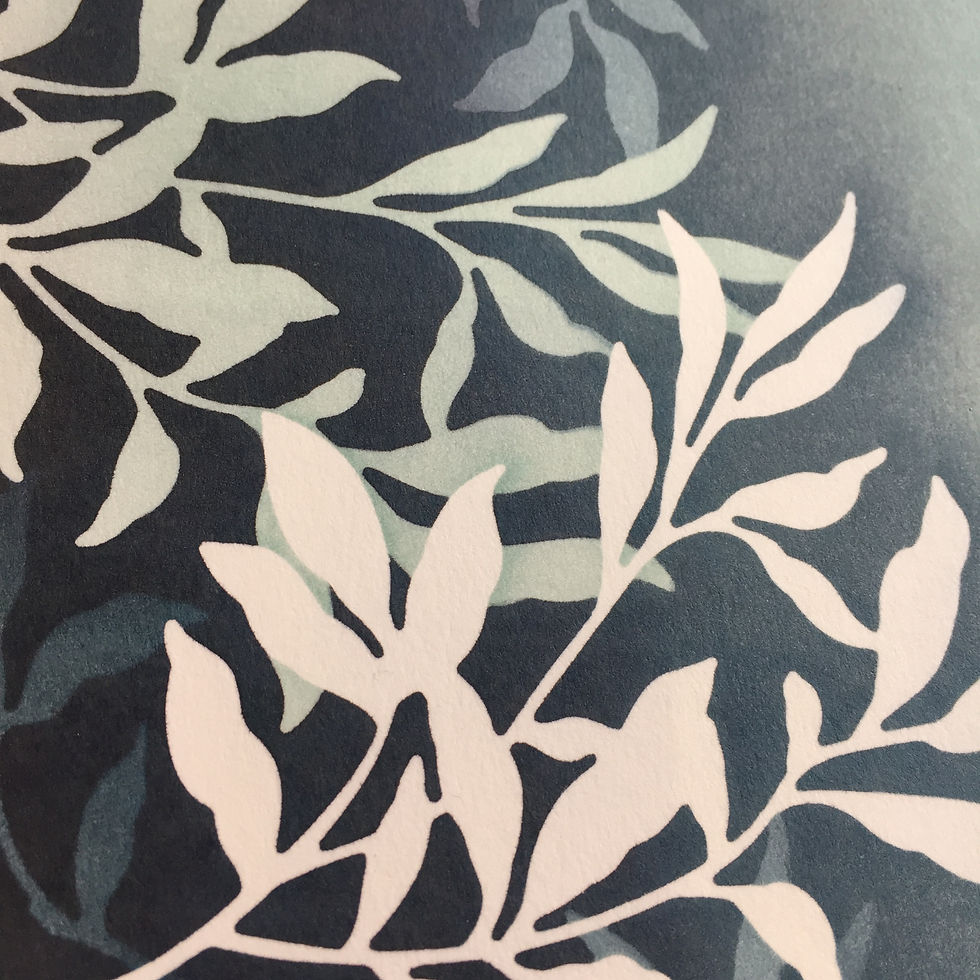
For this card, I die-cut the same leaf cluster four times from masking paper and built up a layered, overlapping composition on a 5" x 7" watercolor panel (200 gsm). Here's the step-by-step:
I placed the first mask and blended the lightest ink (Misty Morning) across the whole panel.
Added the second mask, overlapping the first, and blended the second lightest shade (Cloudy Sky).
Placed the third mask and a portion of the fourth, overlapping with the second and first, then blended Nimbus over about two-thirds of the panel.
For the final layer, I added another section of the fourth mask and blended Dark Night over about a third of the panel.
💡 Tip: If I know I’ll be reusing a mask or blending over it heavily, I reinforce it with clear tape before die-cutting. This keeps the edges crisp and prevents ink from bleeding through. I store these reinforced masks with the coordinating die or stamp for future use.
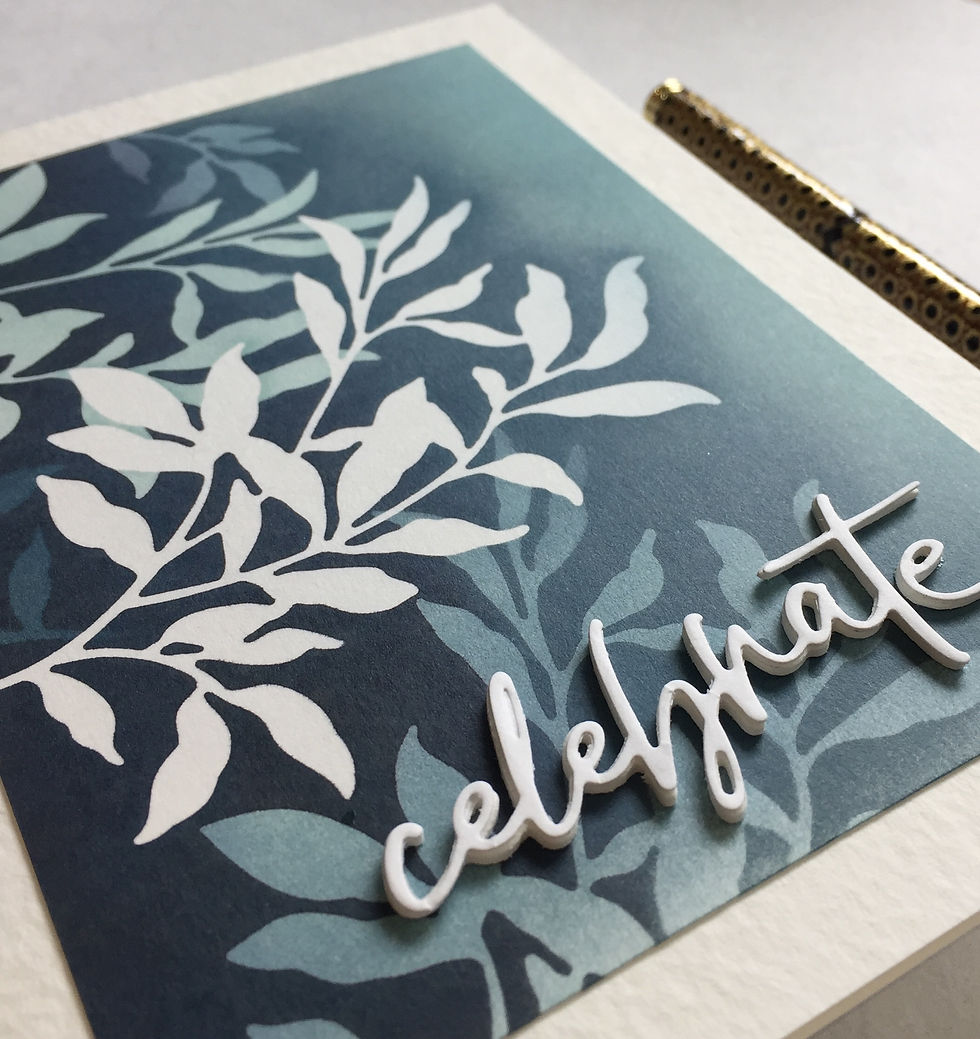
Sometimes less really is more
Initially, I had more planned for this card, but when I peeled off the masks, I loved the soft transitions and depth so much I kept the rest super simple. I trimmed the panel to 4" x 6", mounted it onto a heavy 5" x 7" card base (300 gsm), and added a popped-up white “Celebrate” sentiment. The luxurious texture of the paper, combined with the soft ink gradients, makes this card one of my favorite AECP creations to date!
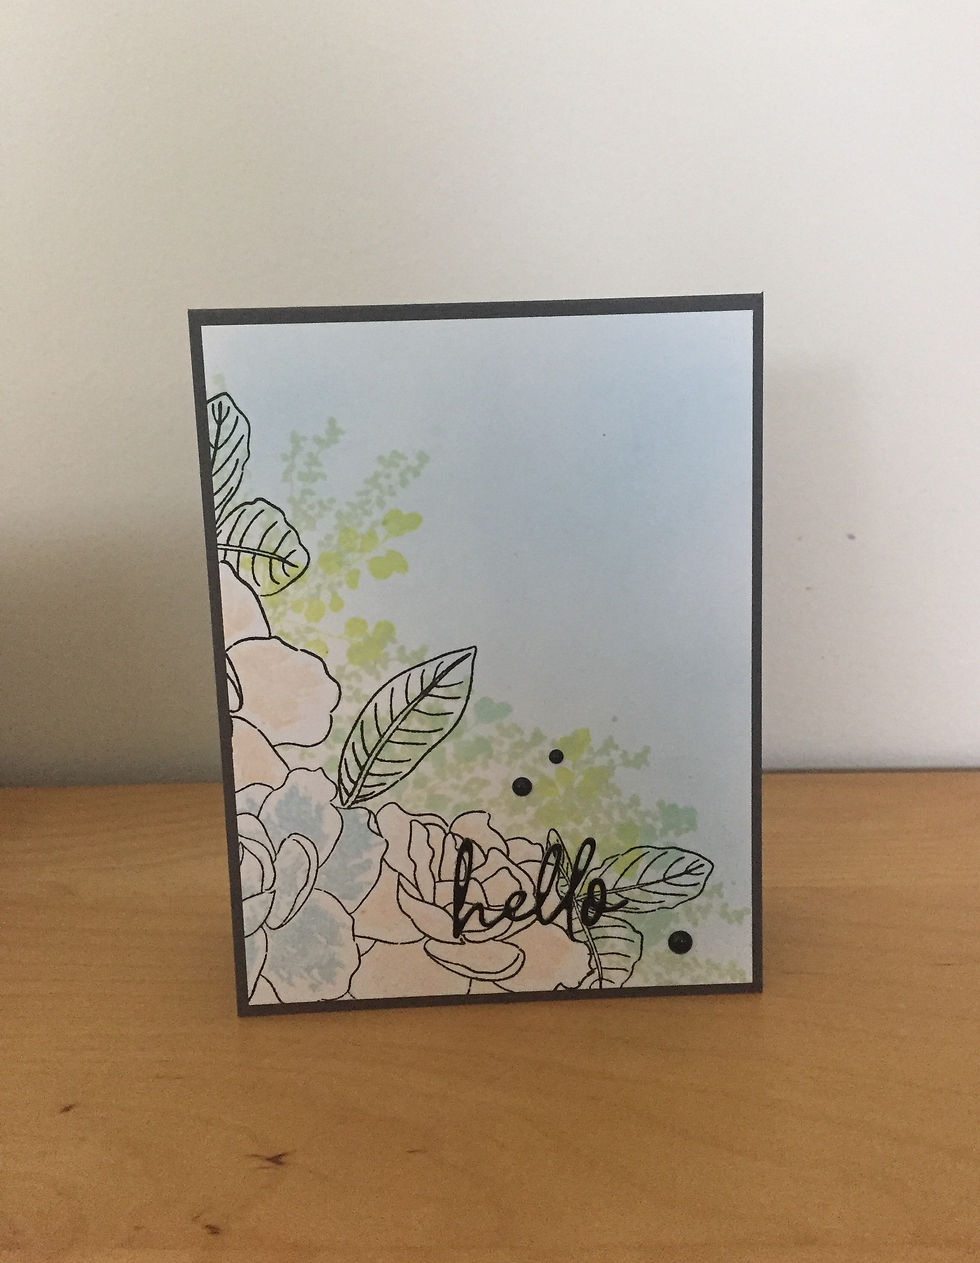
Card 2: Blooming in Layers
🛠 Materials used:
Golden Days Stamp Set
Better Together Stamp Set
Masking Paper
Crisp Dye Ink: Pinkalicious
Obsidian Pigment Ink
Coloring Pencils
Black Enamel Dot
Neenah Solar White 110 lbs cardstock
🎨 How to:
For this one-layer card, I stamped the outline of the Golden Days flower in Obsidian ink in the bottom left corner of an A2 card base. Then I:
Covered the stamped flower with a fussy-cut mask.
Using Pinkalicious ink, I stamped the second layer of the same flower all over the background.
Removed the mask to reveal a crisp outline and colored it in using coloring pencils in soft peach and pink tones.
Added a sentiment from the Better Together set and finished with a few enamel dots.
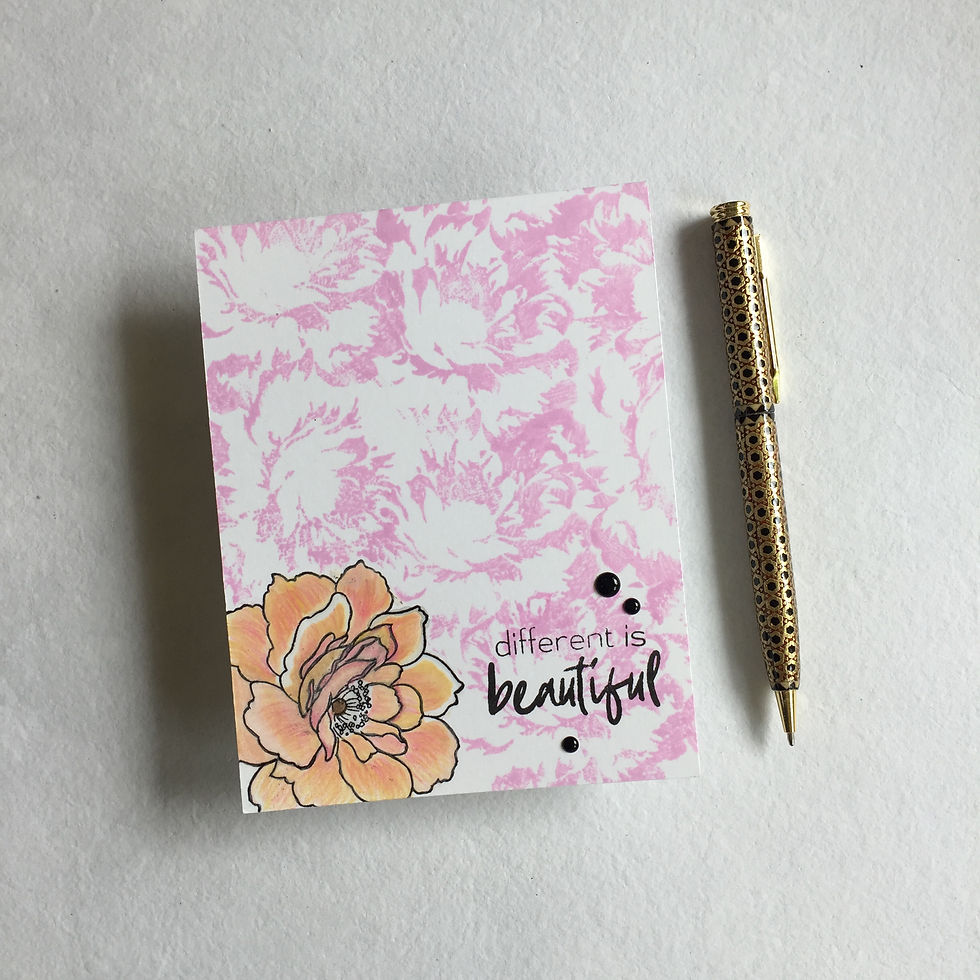
This card is simple, yet effective — a reminder that masking is a powerhouse technique for building beautiful one-layer cards.
🖌️ Final Thoughts:
Masking is such a versatile and elegant way to add depth and dimension — without bulk! I’ve really enjoyed diving deeper into masking techniques and am excited to keep experimenting with these techniques and using them more in future projects.
✨ Have you tried masking in your cardmaking? I’d love to hear how you use it! Let me know in the comments or tag me on Instagram @caracaro33.
Thanks so much for visiting — and until next time, I wish you a crafty good time! 🌸

LOVE LOVE LOVE!