AECP Level 1 Celebration Stencil Techniques
- carogeo2
- Mar 29, 2025
- 2 min read
Updated: Sep 28, 2025
Hi Everyone!

This AECP project is inspired by the lessons from the Celebration Stencil Techniques class. I hope you like it! ✨
Stencils are such a versatile tool—you can use them to create beautiful backgrounds or let them shine as a focal point. For this card, I chose to make the Mega Hydrangea Stencil the star of the show.
I started by ink-blending three gorgeous shades through the stencil onto a white panel:
🟡 Sunray Fresh Dye Ink
🟠 Chamomile Fresh Dye Ink
🌸 Fuchsia Fresh Dye Ink
I applied the colors more heavily in the center and let them fade out toward the edges to create the look of a single hydrangea petal. Once the blend was smooth, I used a stipple brush to add a few Fuchsia specks for extra texture, then placed a pink pearl at the center for a delicate finishing touch.
For the sentiment, I used the Sweet Sentiments Die Set to cut out “thanks” and blended Fuchsia on the upper half and Chamomile on the lower half to match the focal point. For some shine, I added Diamond Glaze to the sentiment before adhering it to the panel.
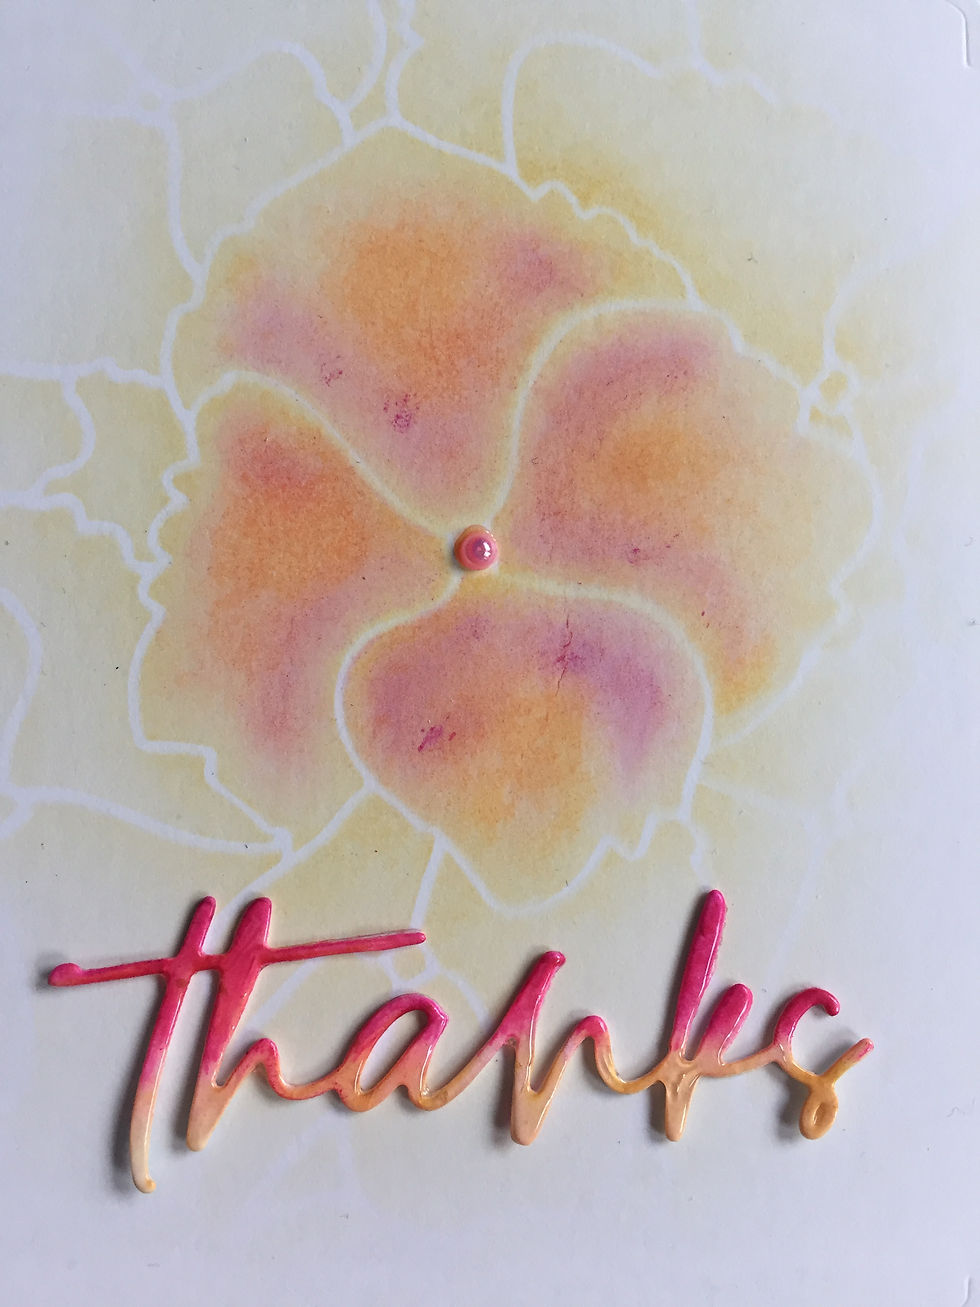
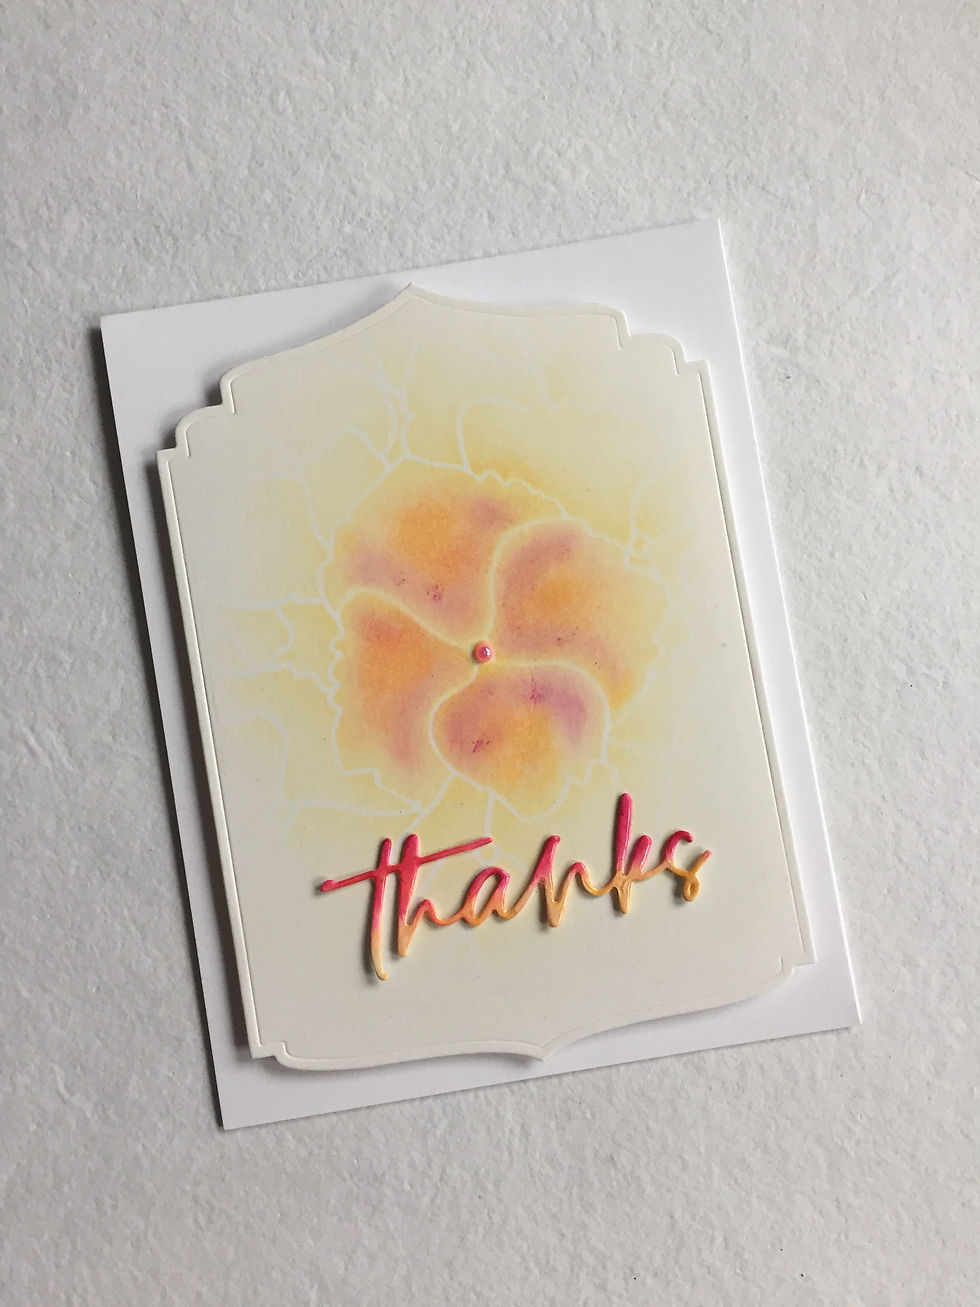
To add dimension, I die-cut my panel with the largest die from the Ornate Nesting Die Set. I also cut a smaller panel from fun foam using the second largest die to give my panel a bit of lift.
Finally, I adhered everything to a card base—but I was torn between a crisp white and a deep anthracite. After photographing both options, I went with the anthracite, and I love how it makes the colors pop!
What do you think? Did I make the right choice? Drop a comment below—I’d love to hear your thoughts!
Thank you so much for stopping by, and happy crafting! ✨✂️ 🌸
pretty!! LOVE that ornate die!